Micro Swiss Direct Drive Extruder for
Creality CR-10 / Ender 3 Printers
Installation Guide
SKU Part Numbers:
M2601
M2602


- Stepper motor and roller wheels are NOT included
- 1 x Micro Swiss All Metal Hotend (If option selected)
- 1 x Main Extruder body
- 1 x Extruder Lever
- 1 x Spring Pin
- 1 x Spring
- 2 x Gears
- 1 x Knob
- 1 x Shoulder Pin
- 2 x M5 20mm Nylon Patch Bolts
- 1 x M5 30 Bolts
- 1 x M5 Nylon Lock Nut
- 1 x M5 Washer
- 1 x Extension Cable
- 3 x M3 Motor Mounting Screws
- 2 x M3 Bolts
- 2 x M3 Nuts
- 5 x Zip Ties
- 1 x Printed Bracket
- 1 x Beveled Capricorn Liner
| Printer | Compatible | Notes |
| Ender-3 | Yes | |
| Ender-3 Pro | Yes | |
| Ender-3 V2 | See notes | Needs 3D printed fan shroud https://www.thingiverse.com/thing:4408571 |
| Ender-3 Max | See notes | Needs 3D printed fan shroud https://www.thingiverse.com/thing:4408571 |
| Ender-6 | No | |
| CR-10 | Yes | |
| CR-10 V2 | See notes | Will require a longer X-axis GT2 belt, and printed fan shroud |
| CR-10 V3 | See notes | Will require a longer X-axis GT2 belt, and printed fan shroud |
| CR-10S | Yes | |
| CR-10-S4 | Yes | |
| CR-10-S5 | Yes | |
| CR-10 MINI | Yes | |
| CR-20 | Yes | |
Check your extruder motor if it has a removable gear. If its pressed on (no set-screws/not removable) then you will need to replace the stepper motor in order to install the kit.
Preparation
• Print a fan shroud if your printer's stock shroud will not fit. Check Compatibility tab above.
• Verify your stepper motor has a removable gear. If not, then you will need a new stepper motor. We recommend the Creality 42-34.
Step 1
For your safety, turn off and unplug your printer.
Make sure the hotend is at room temperature before working on the printer
Step 2 - Remove the fan shroud
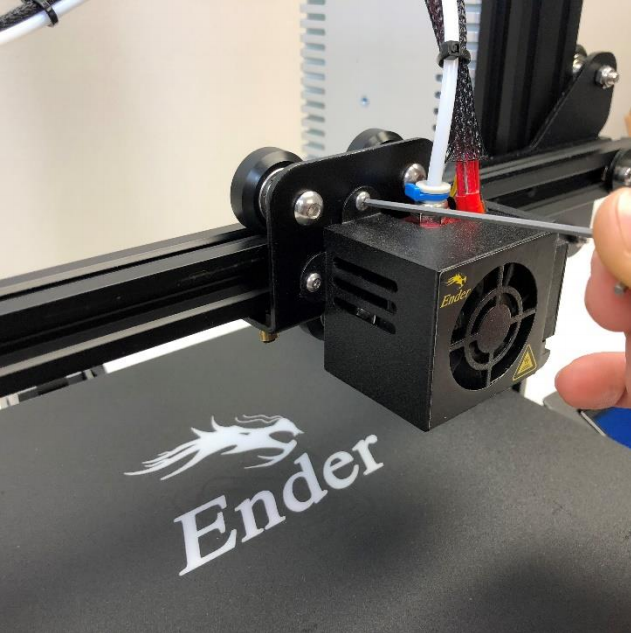
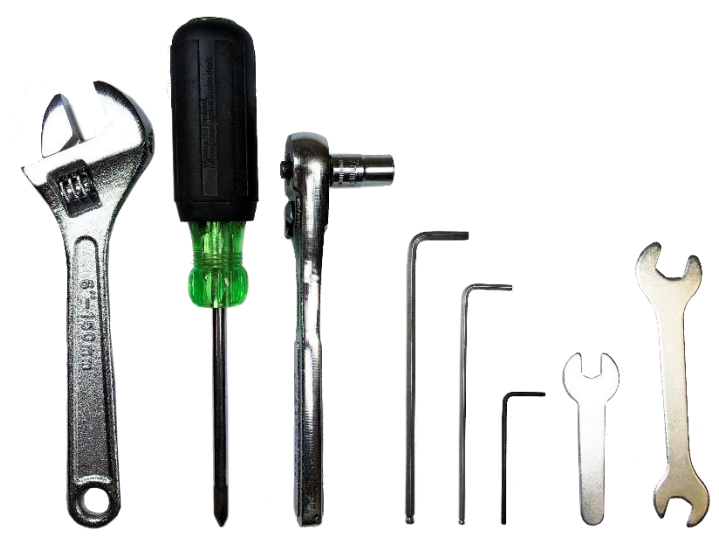
• Use the 2mm Allen wrench to remove the
fan shroud
Step 3 - Remove the stock hotend
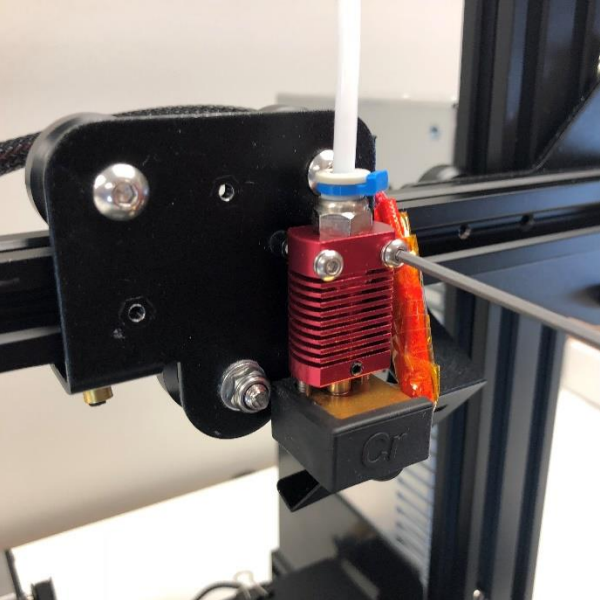
• Remove the hotend using the 2.5mm Allen
wrench
• Unscrew the two screws holding the hotend
to the mounting bracket
• ️ Make sure the hotend is at room
temperature!
Step 4 – Remove heater cartridge, thermistor and bowden tube

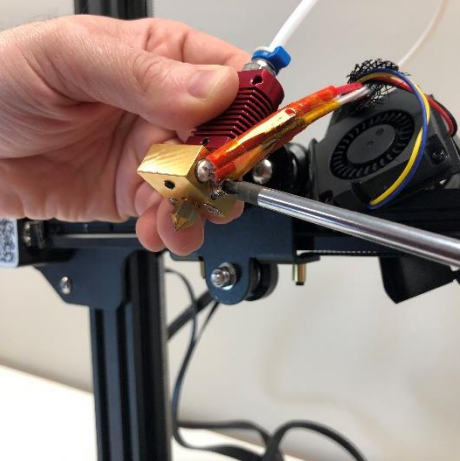

• Loosen the heater cartridge
with the 1.5mm Allen wrench
• Remove the thermistor
screw with the Phillips-Head
screwdriver
• Carefully remove the heater
cartridge and thermistor
assembly
• Remove the Bowden tube
Step 26 – Extruder calibration


• Adjust the Esteps to 130
Option 1: Download this GCode and print it on your printer.
Option 2: Manually adjust Esteps using the control panel menu
Step 27 – Home offset calibration


• Adjust the Home offsets for the Direct Drive extruder
Download this GCode and print it on your printer.
Step 28 – Slicer adjustment

• Reduce the Retraction Distance in your slicer to about 1.0mm @ 35mm/s
(Maximum: 1.5mm)
• With All Metal Hotend, the nozzle temperature might need to be increased by 5-10 °C